With the smoke simulation feature in Houdini I was able to achieve a short scene where a car drifts
on our own parking lot. The following steps were taken to achieve the result:
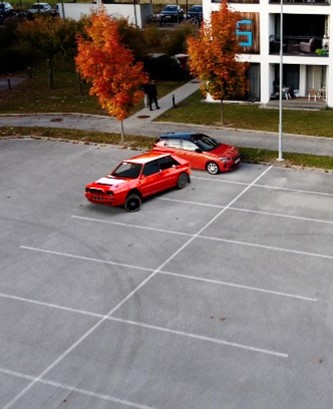
Filming with Camera Drone
At first I used my camera drone DJI Mini 2 to film some scenes on our parking lot. After I kind of imagined the way the car could take I took a few shots and searched for the best and smoothest one. I also took an HDRI with my phone for the rendering process later.
3D Camera Tracking with Adobe After Effects
I used the 3D camera tracker from Adobe After Effects to get the path of the camera. With a downloaded script file I was able to export the camera track for Autodesk Maya.
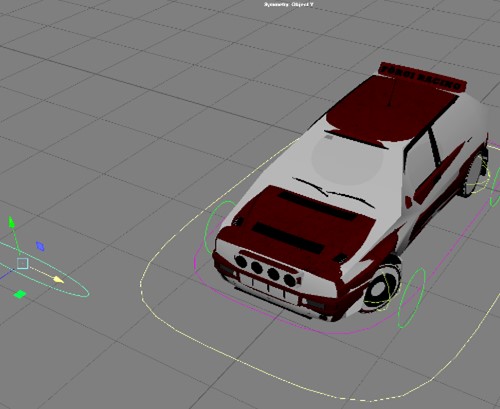
Animate Car in Autodesk Maya
After the camera path was clear my next step was animating the car. Therefore, I downloaded a race car and rigged it in Maya. I rigged the car in order to animate steering and the weight balancing of the car itself and for animating the rotation of the wheels. Also a low poly version was in the rig for the collision in Houdini later.
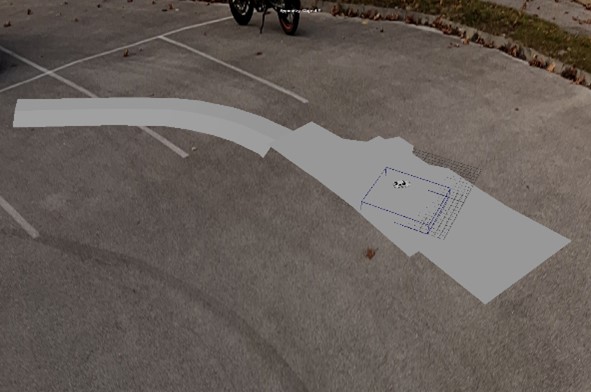
Building a 3D scene from camera tracking points
With the point cloud generated from After Effects I was able to create the ground plane which was the same size than the actual parking lot. From there on animating became easier since I had the real world boundaries in sight all the time.
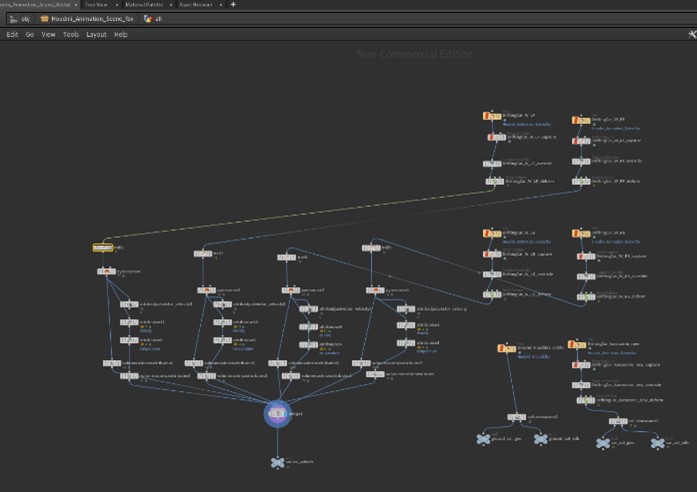
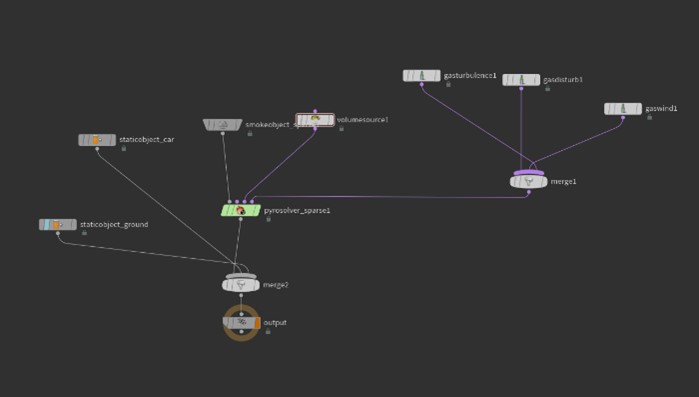
Smoke Simulation in Houdini
After animating the car was finished I uploaded the low poly car and its animation track to Houdini to simulate the smoke from its wheels. After experimenting a few hours I found the sweet spot for realism, calculation time, file size and looks with the help of our professor. All four wheels were treated seperately and had some noises on their behaviour. In order to reduce complexity the shole wheel emits smoke and not only the part where it touches the ground.
To enhance the simulation the velocity of the wheels in the world space was calculated to push the smoke in the direction the wheel is moving. So the rotation of the tyres was integrated in the smoke simulation.
Over time the tyres emit variable smoke. This depends on the driving behaviour of the car and was animated in the curve on the right image. After chaching the simulation on my external disk in school as VDB frames I was able to put the result inside Autodesk Maya for rendering.
Rendering with Arnold in Maya & Post Producation
The rendering process took about one day. Interestingly CPU rendering of the smoke was faster than GPU rendering for the same quality level. So I decided to use CPU rendering with Arnold. After all lights and the HDRI was positioned and the smoke had a natural look I started the rendering process with 1080p and 30fps, motion blur enabled (sadly too much after own review) and decent quality settings.
I rendered it all in one take because of the lack of time but it still looks decent. Usually I should have rendered a few different passes like shadow, smoke, car, reflections. After rendering was completed I started to do some colour correction in Adobe After Effects and did the sound design in Adobe Premiere Pro.